
Thessaloniki, Greece
self
Thessaloniki, Greece

Stockholm, Sweden

Self-portrait
April 2009


This is not meant to be a tutorial, I just thought it would be cool to show the steps that led to creating my all time favorite self-portrait (as of yesterday). I use Lightroom for editing, but I won't go into technical details, the process is far more interesting and can be done in most of the photo editing programs.
First, the obligatory before/after image.


(continued on next page)
1. This is the original photo I took in my bathroom.

2. I started by fixing white balance and brightness/blacks levels.

3. I tried different brightness and contrast settings but wasn't satisfied. The image was lacking something, it was too dull. So I thought I should make it high key instead and I dodged my eye a bit.

4. Next, it was time for some split-toning. I like mixing "cold" and "warm" tones (mostly to the "cooler" side) so I went for some green and red.

5. The right part of the image was a bit too dark compared to the rest, so I added some "light" by using a graduated filter with added brightness.

6. I was quite happy at this point, but there still was something bugging me. The background was distracting. I started dodging the lines and it was then that it struck me. Why not completely white out the background to make it look like a big light source? I also changed the color to give an overall greenish tint.

7. Finally, some fine brush work and the haircut!


I always look (too) serious in my self-portraits.
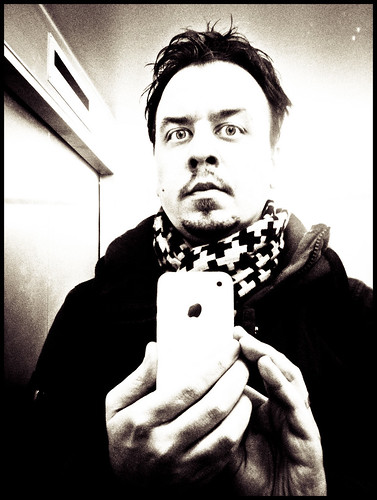
Here are my other self-portraits on Flickr that were taken with my iPhone.


